RZR 119 Rayzor Hall
-
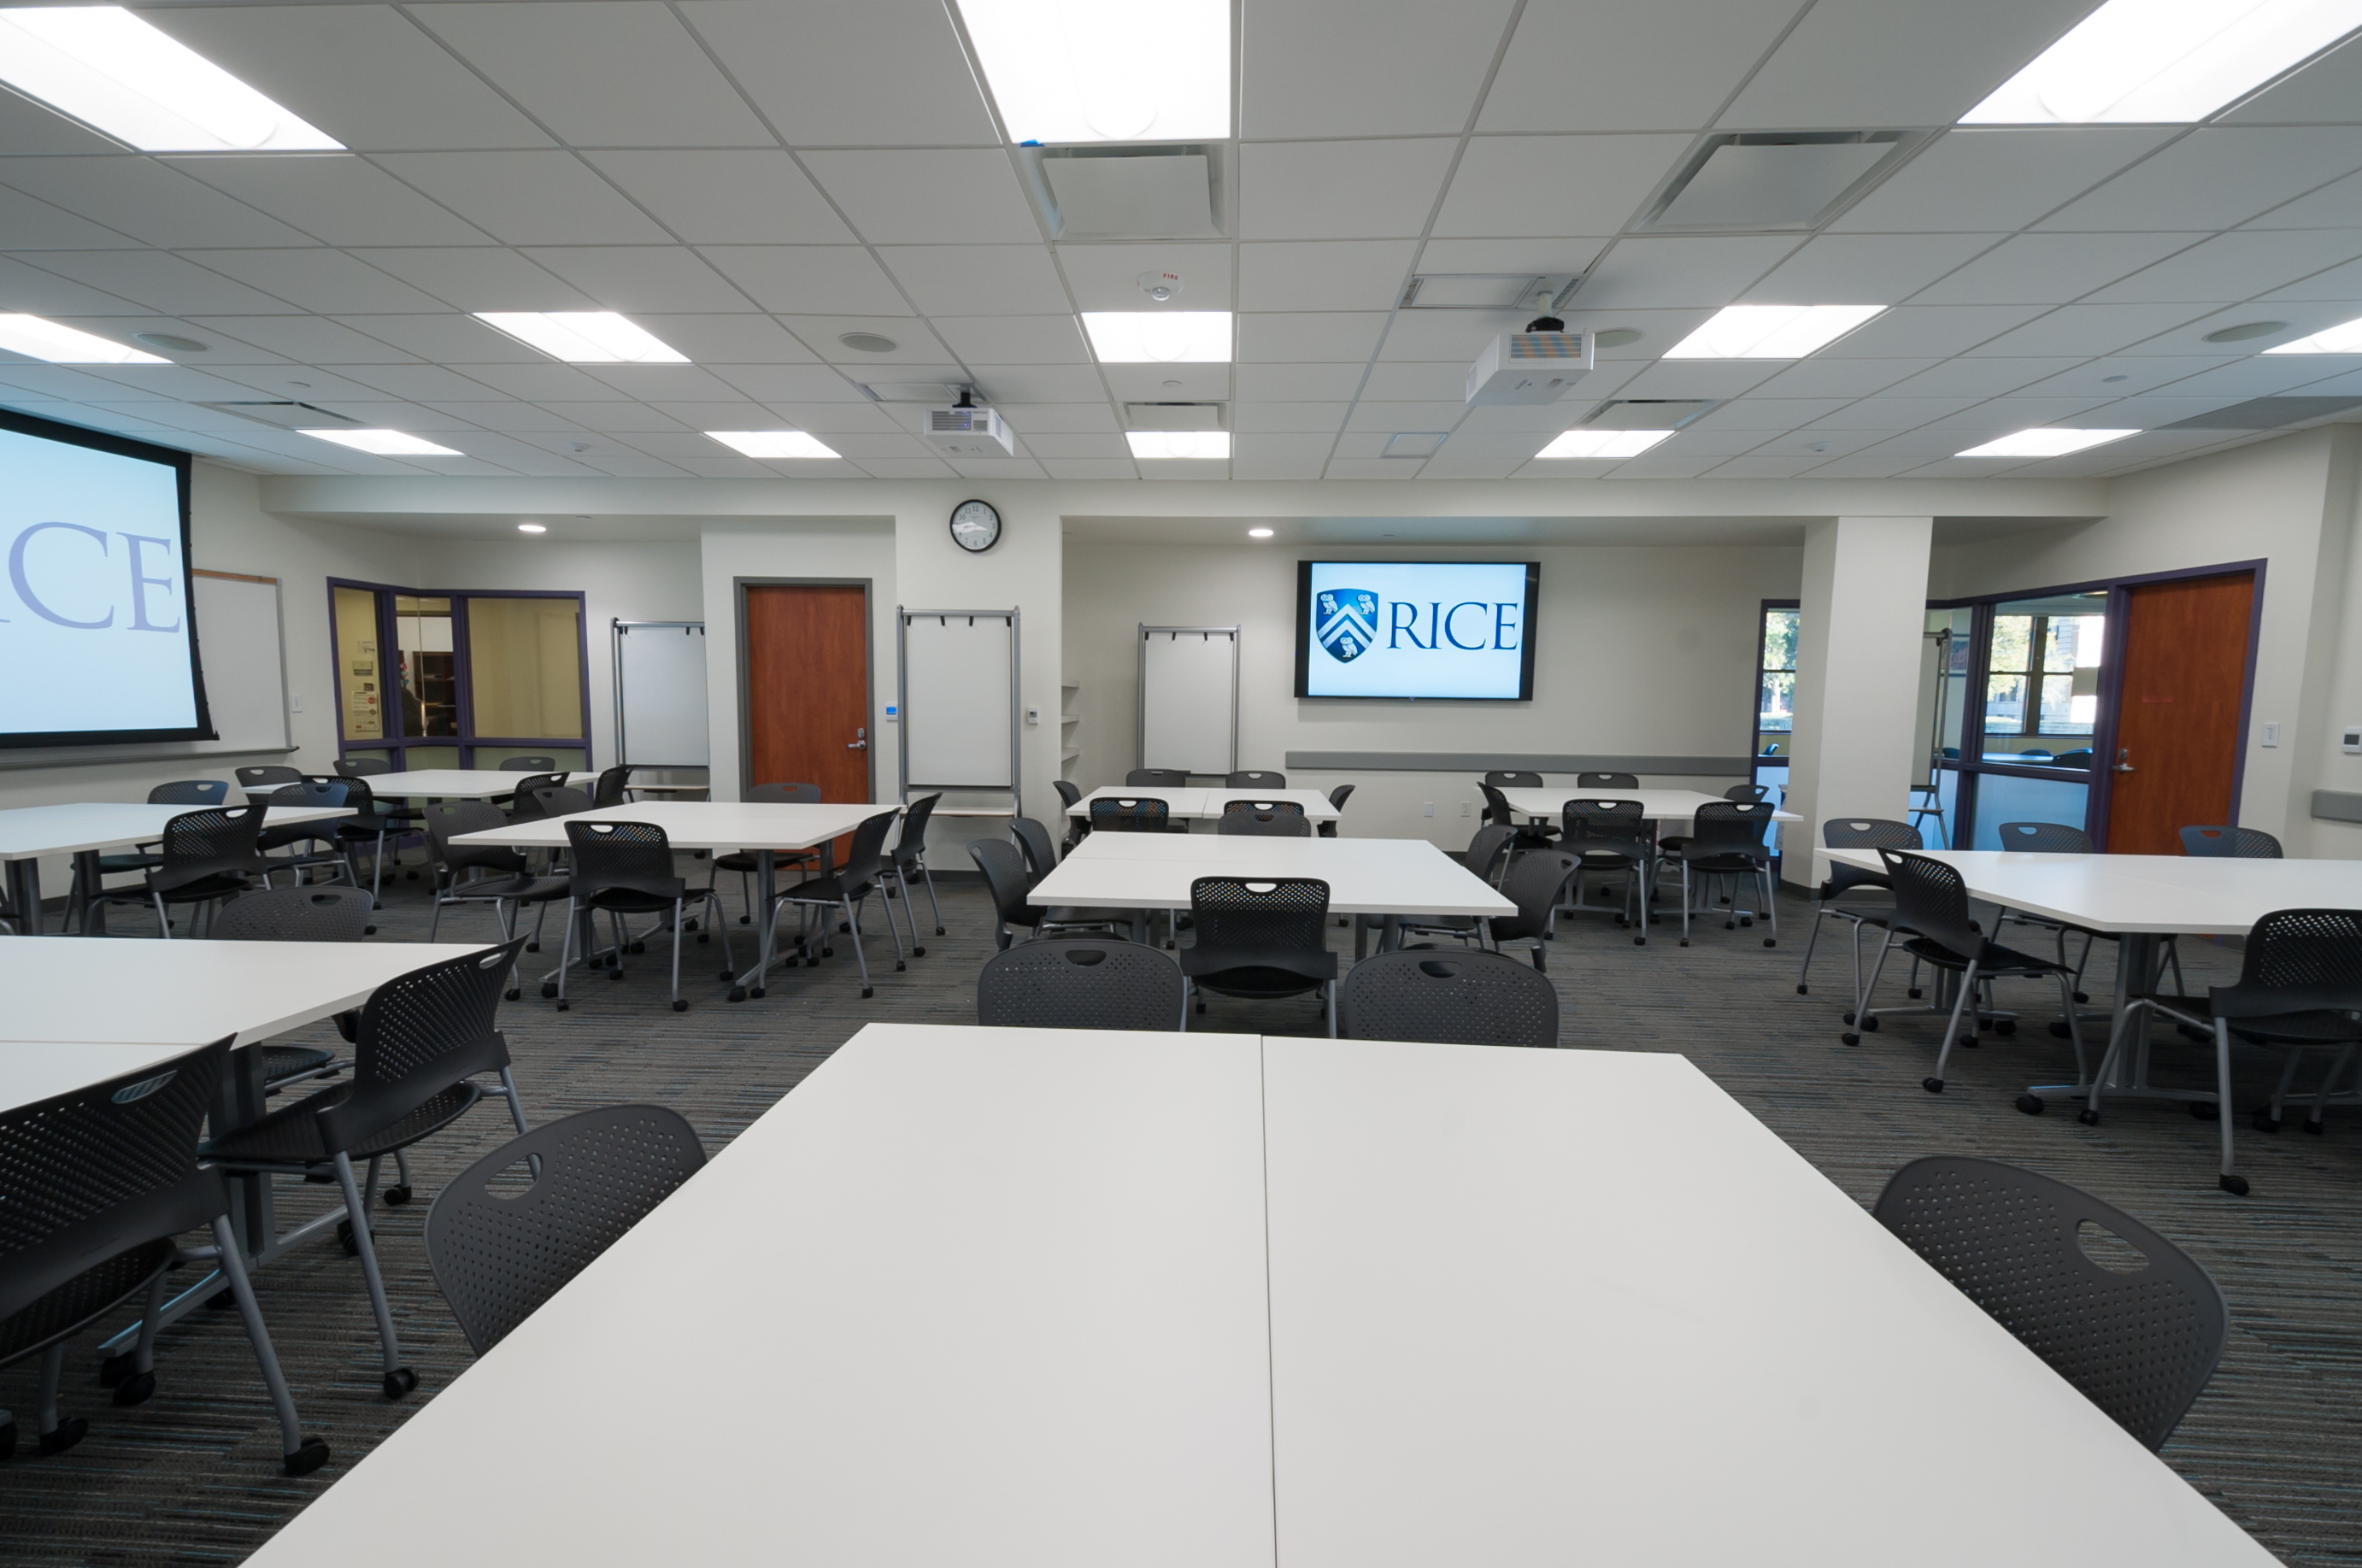
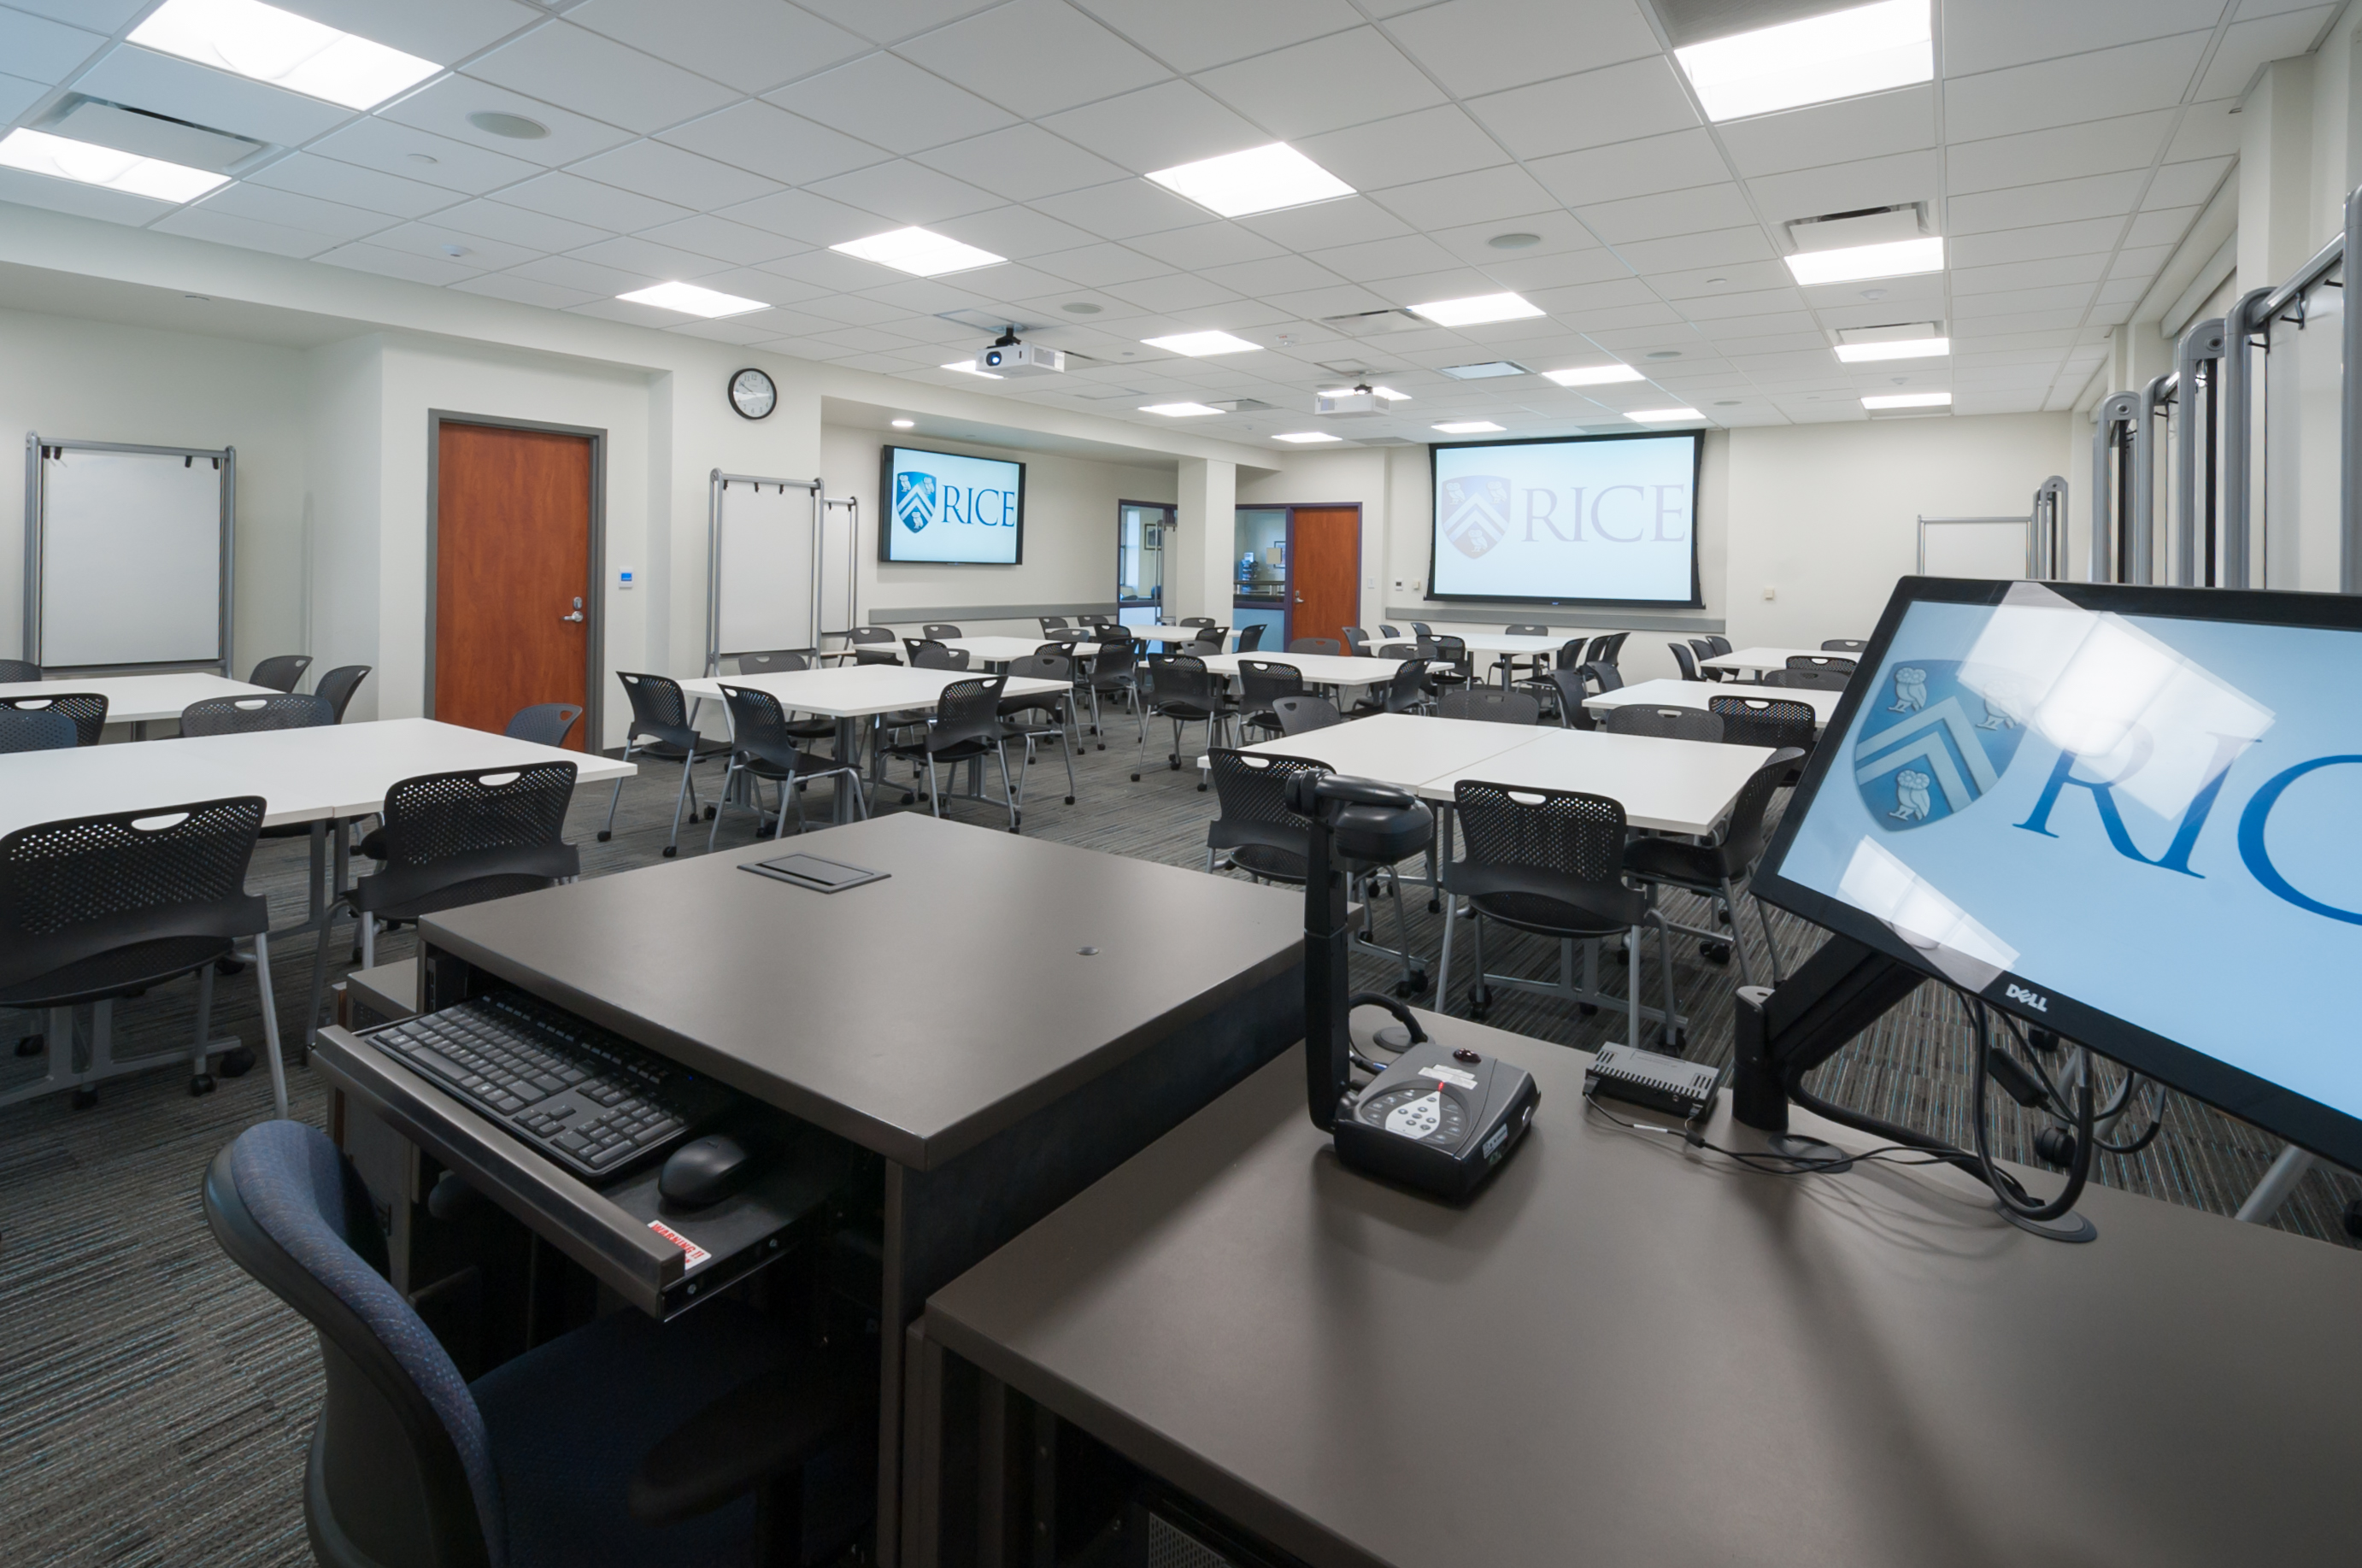
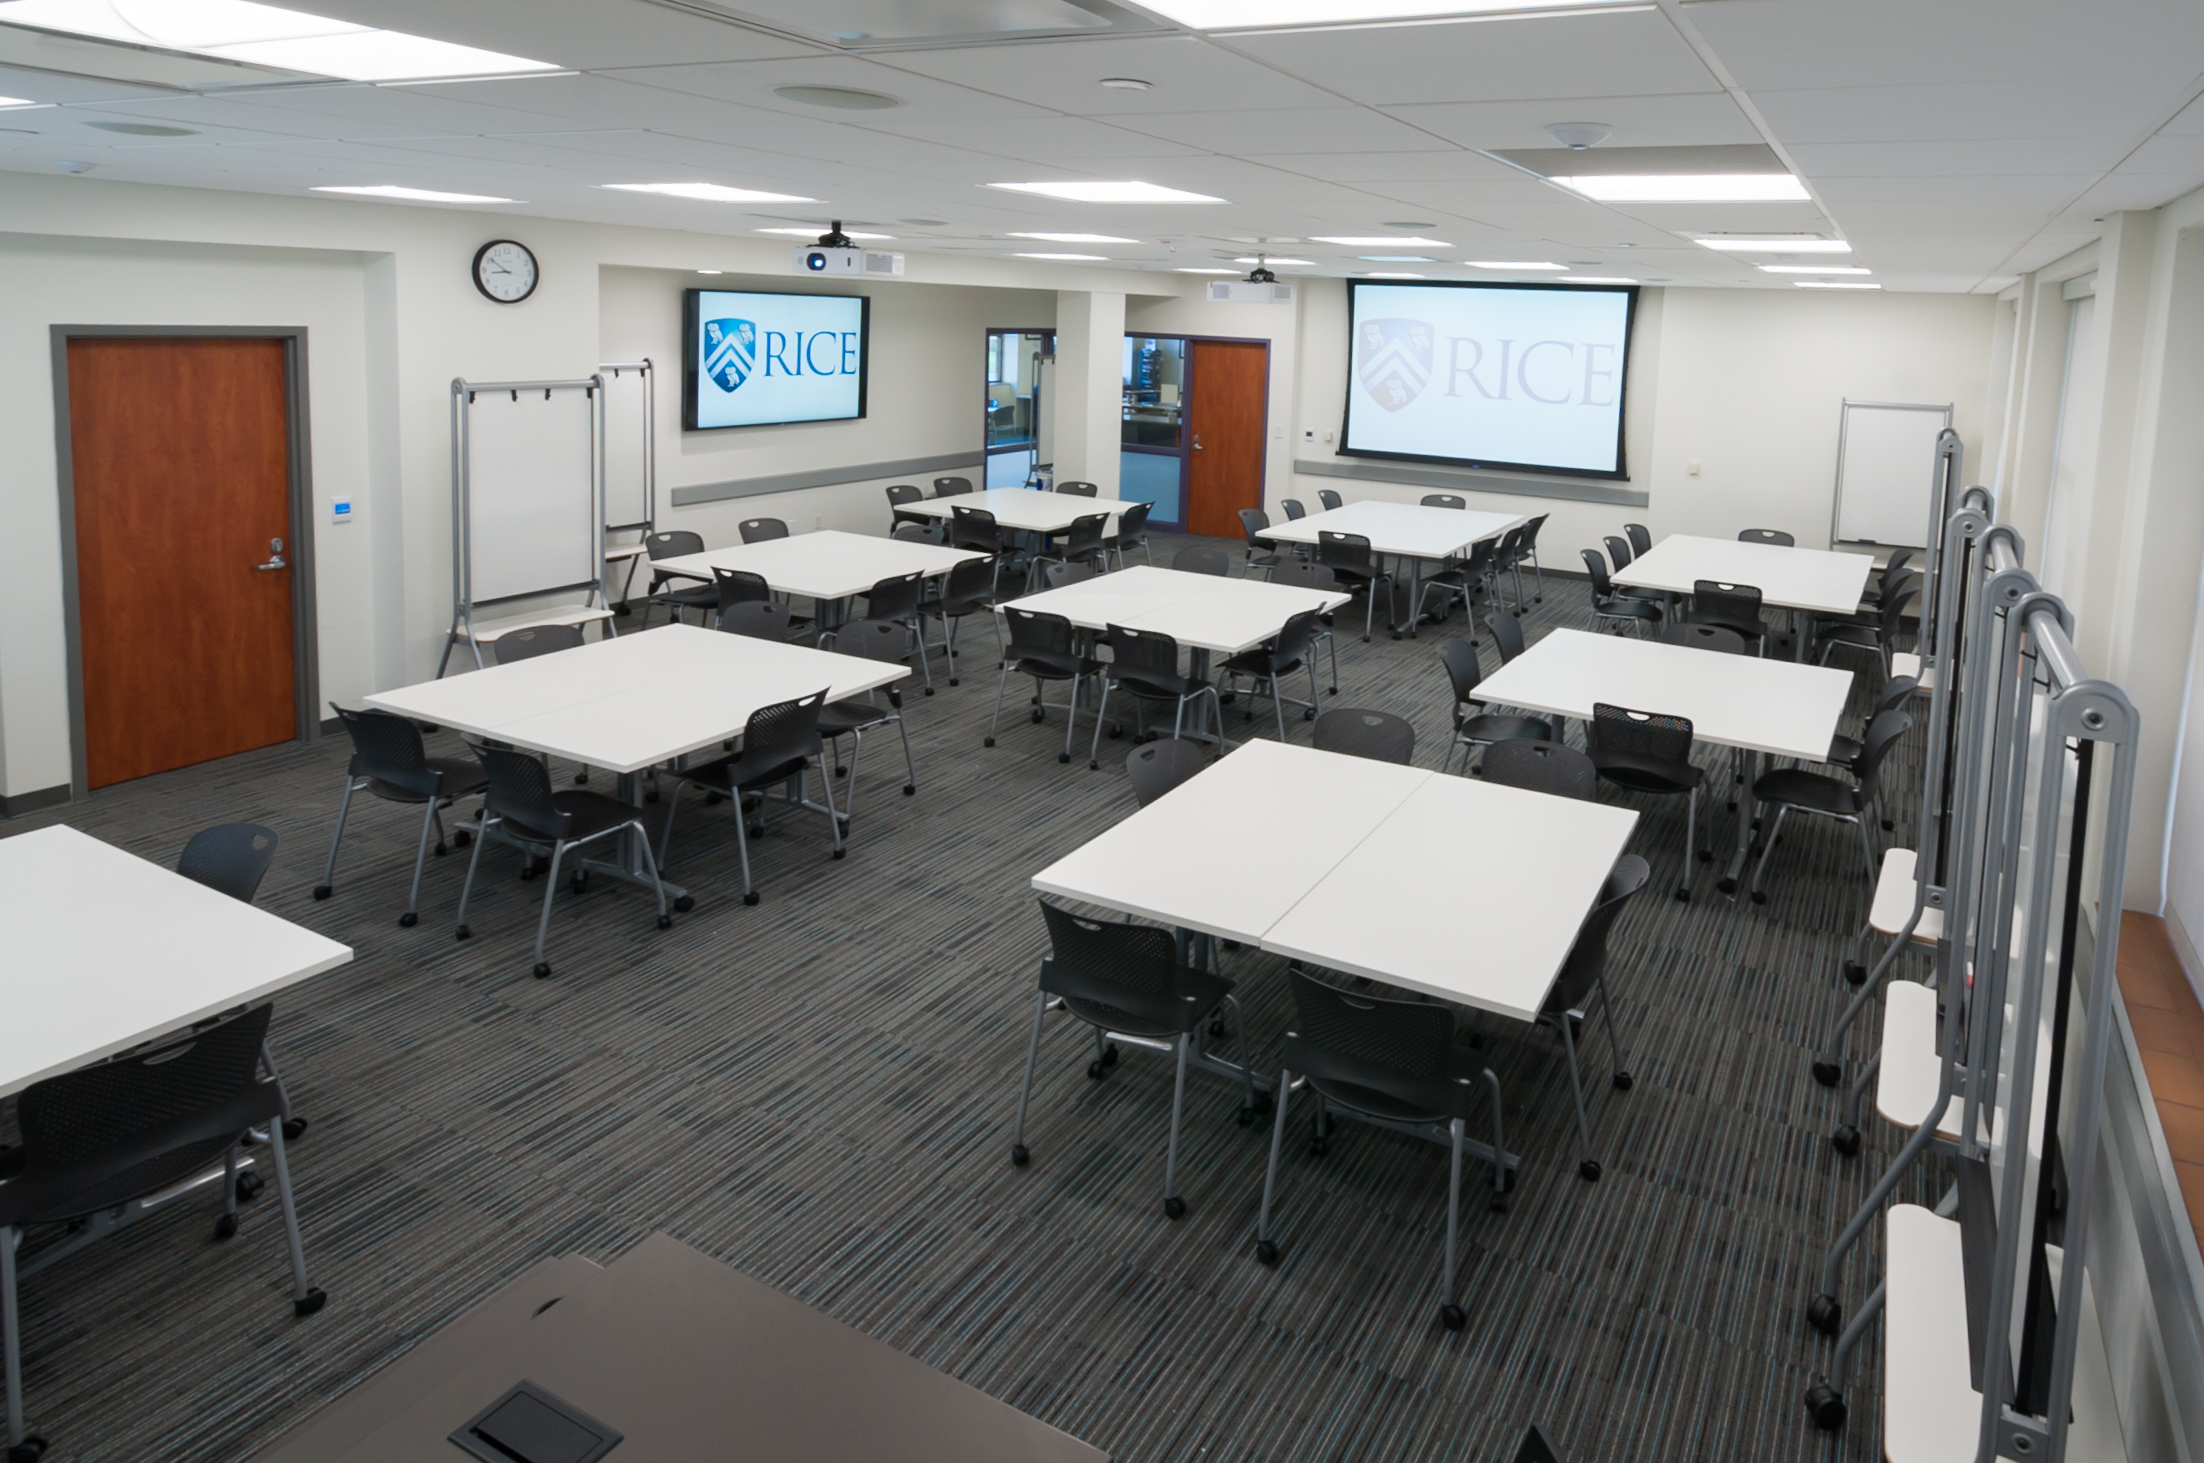
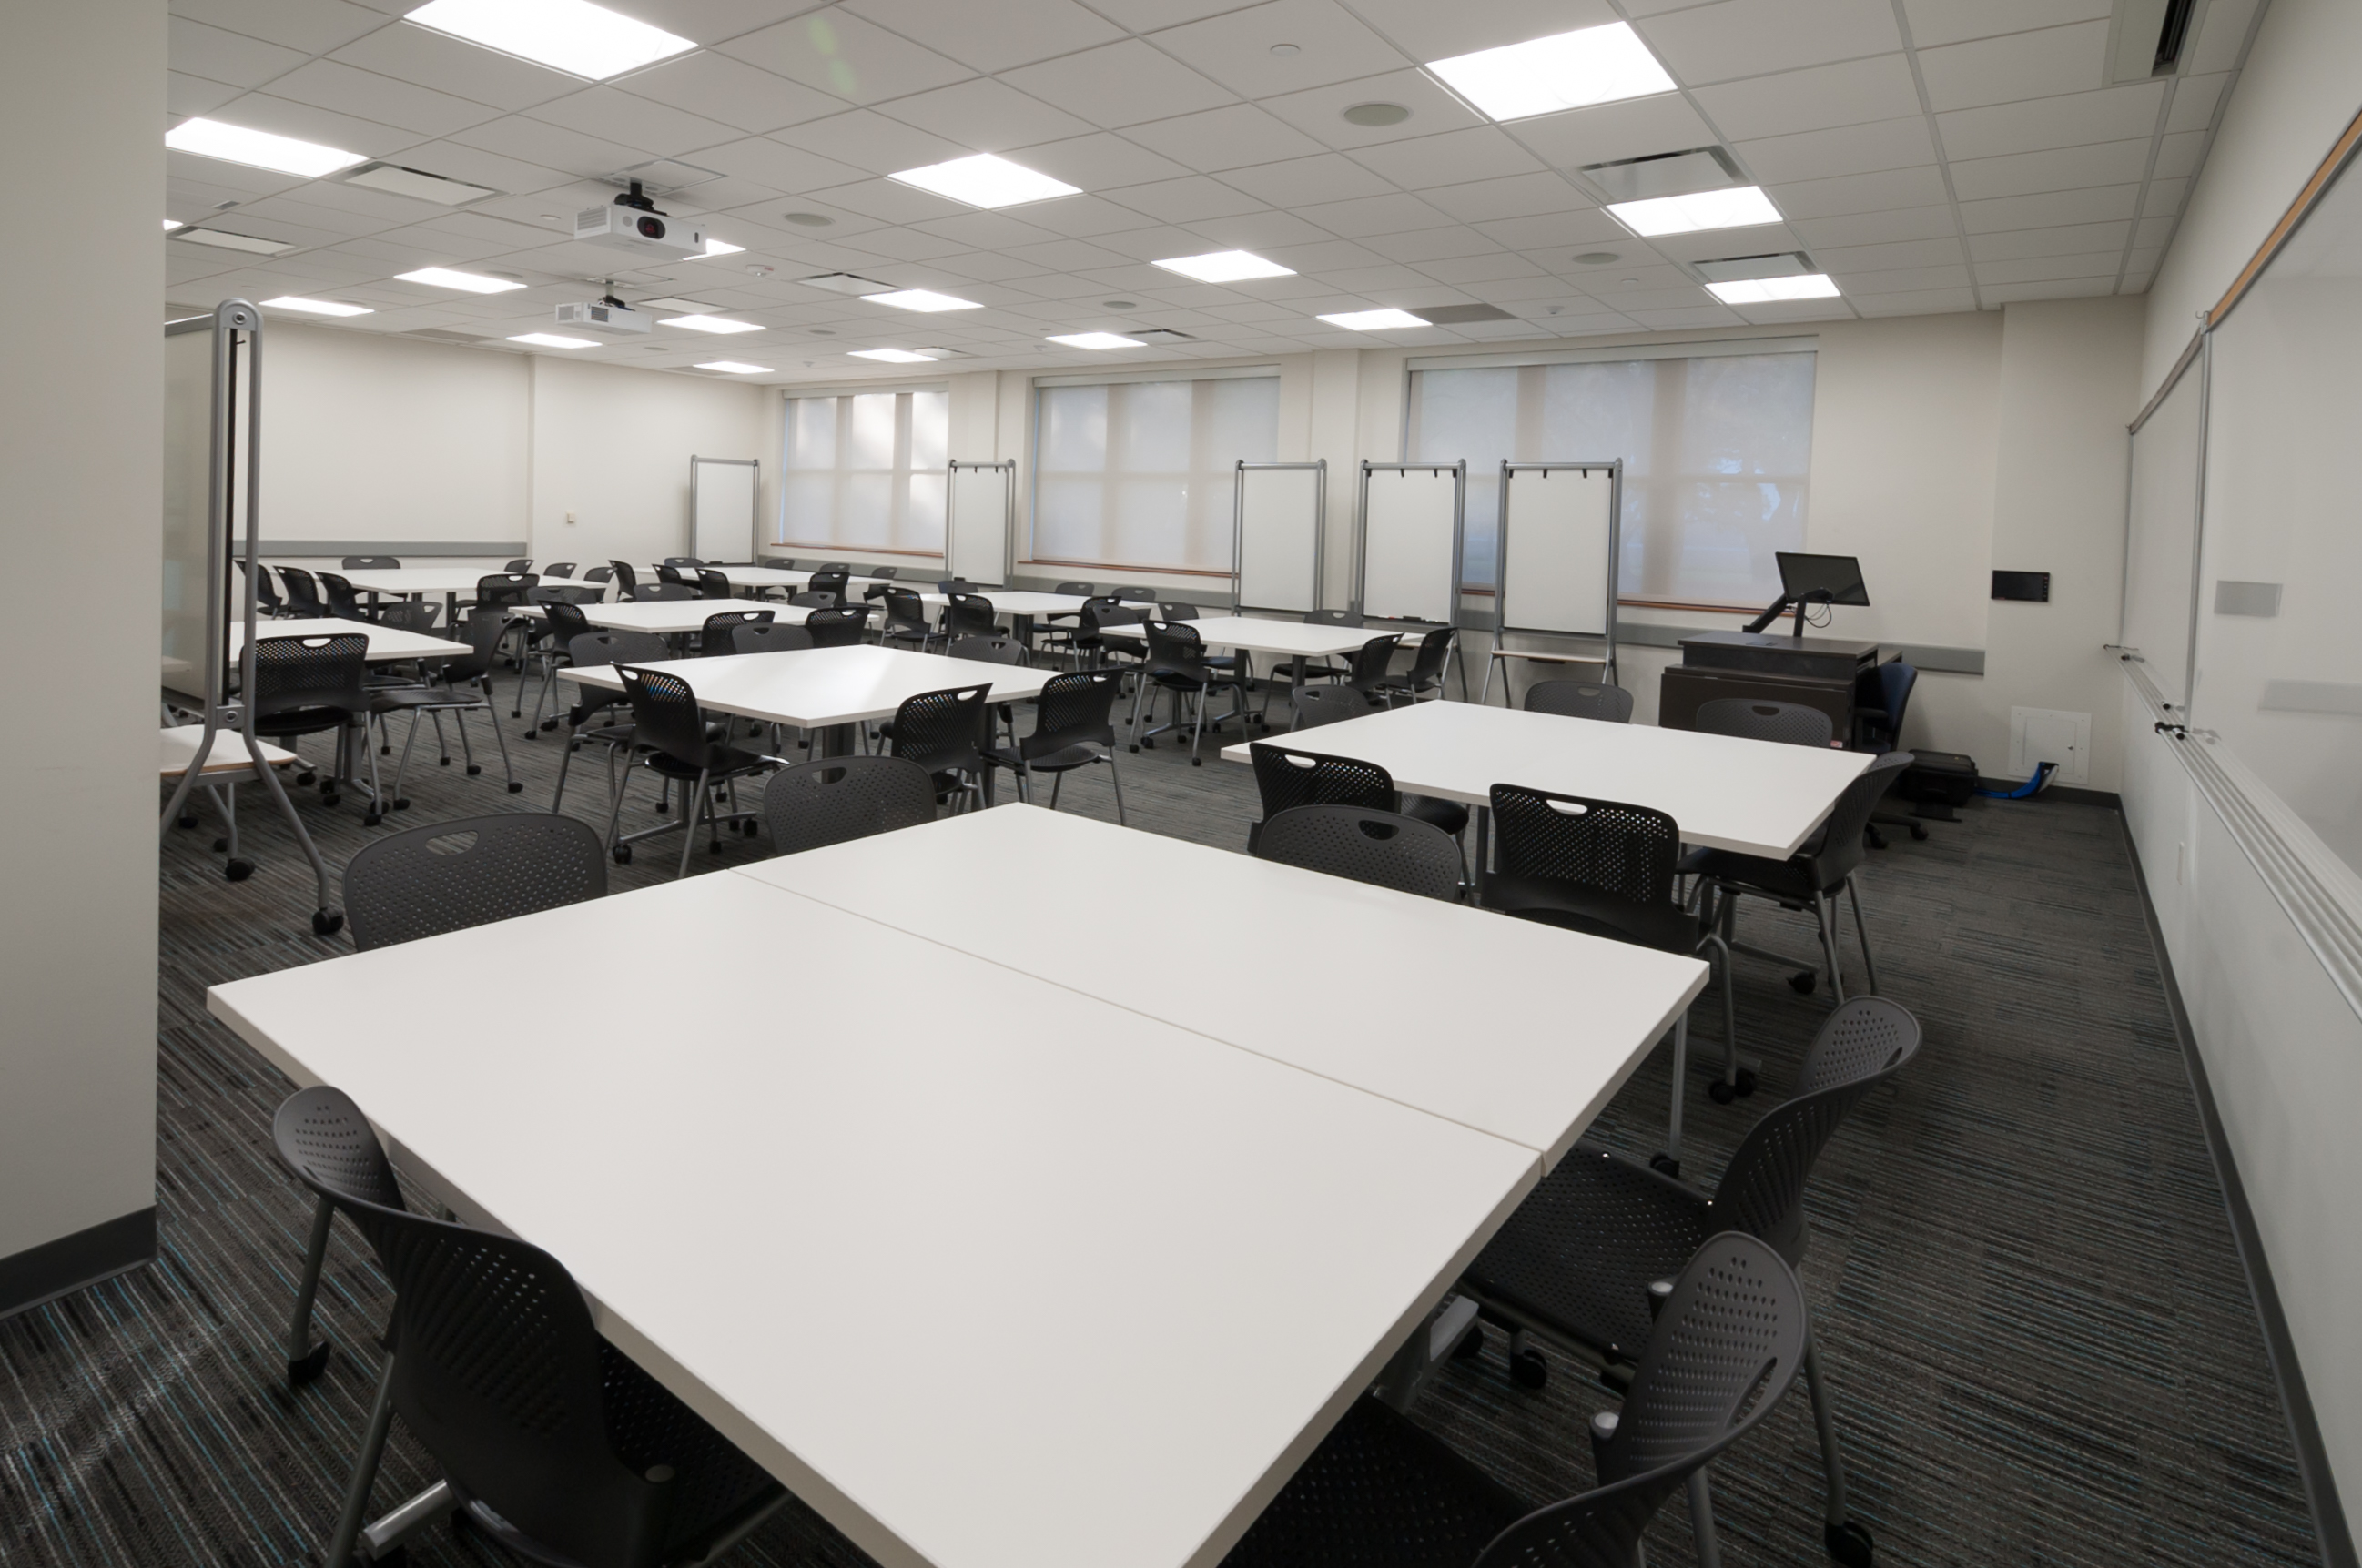 RZR-119 Collaborative Classroom
-
 RZR-119 Collaborative Classroom
-
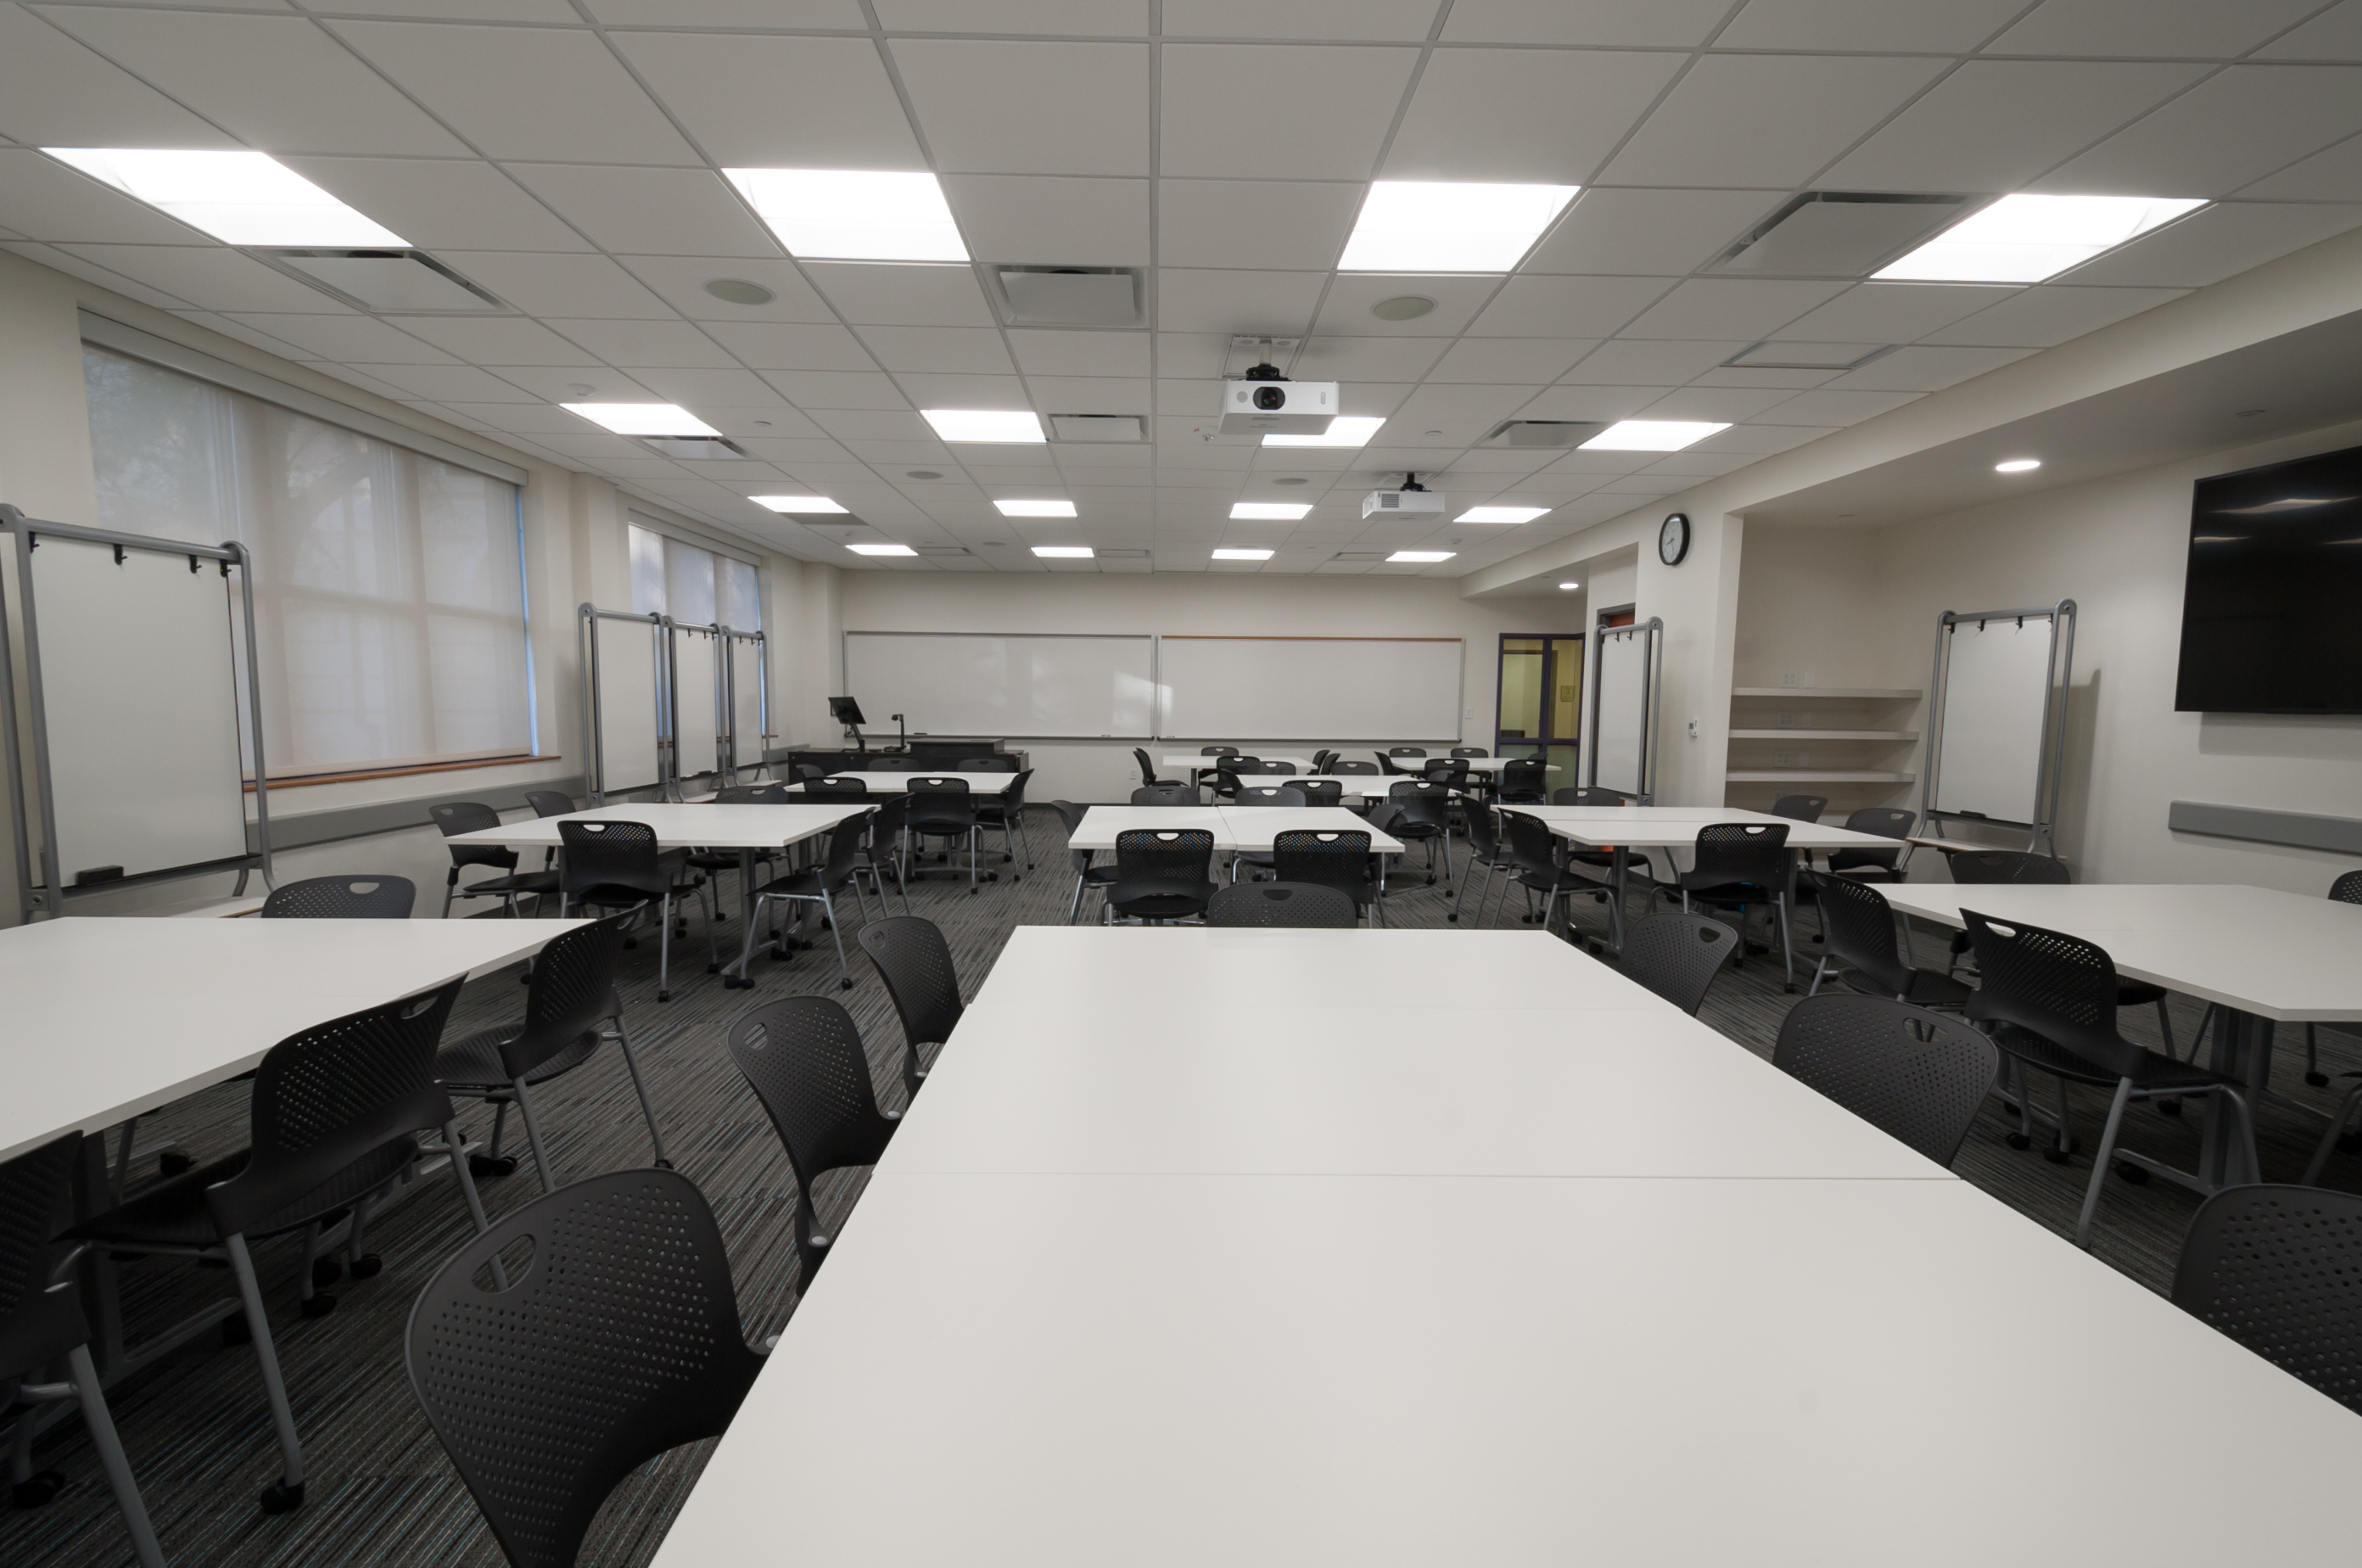
 RZR-119 Collaborative Classroom
-
 RZR-119 Collaborative Classroom
-
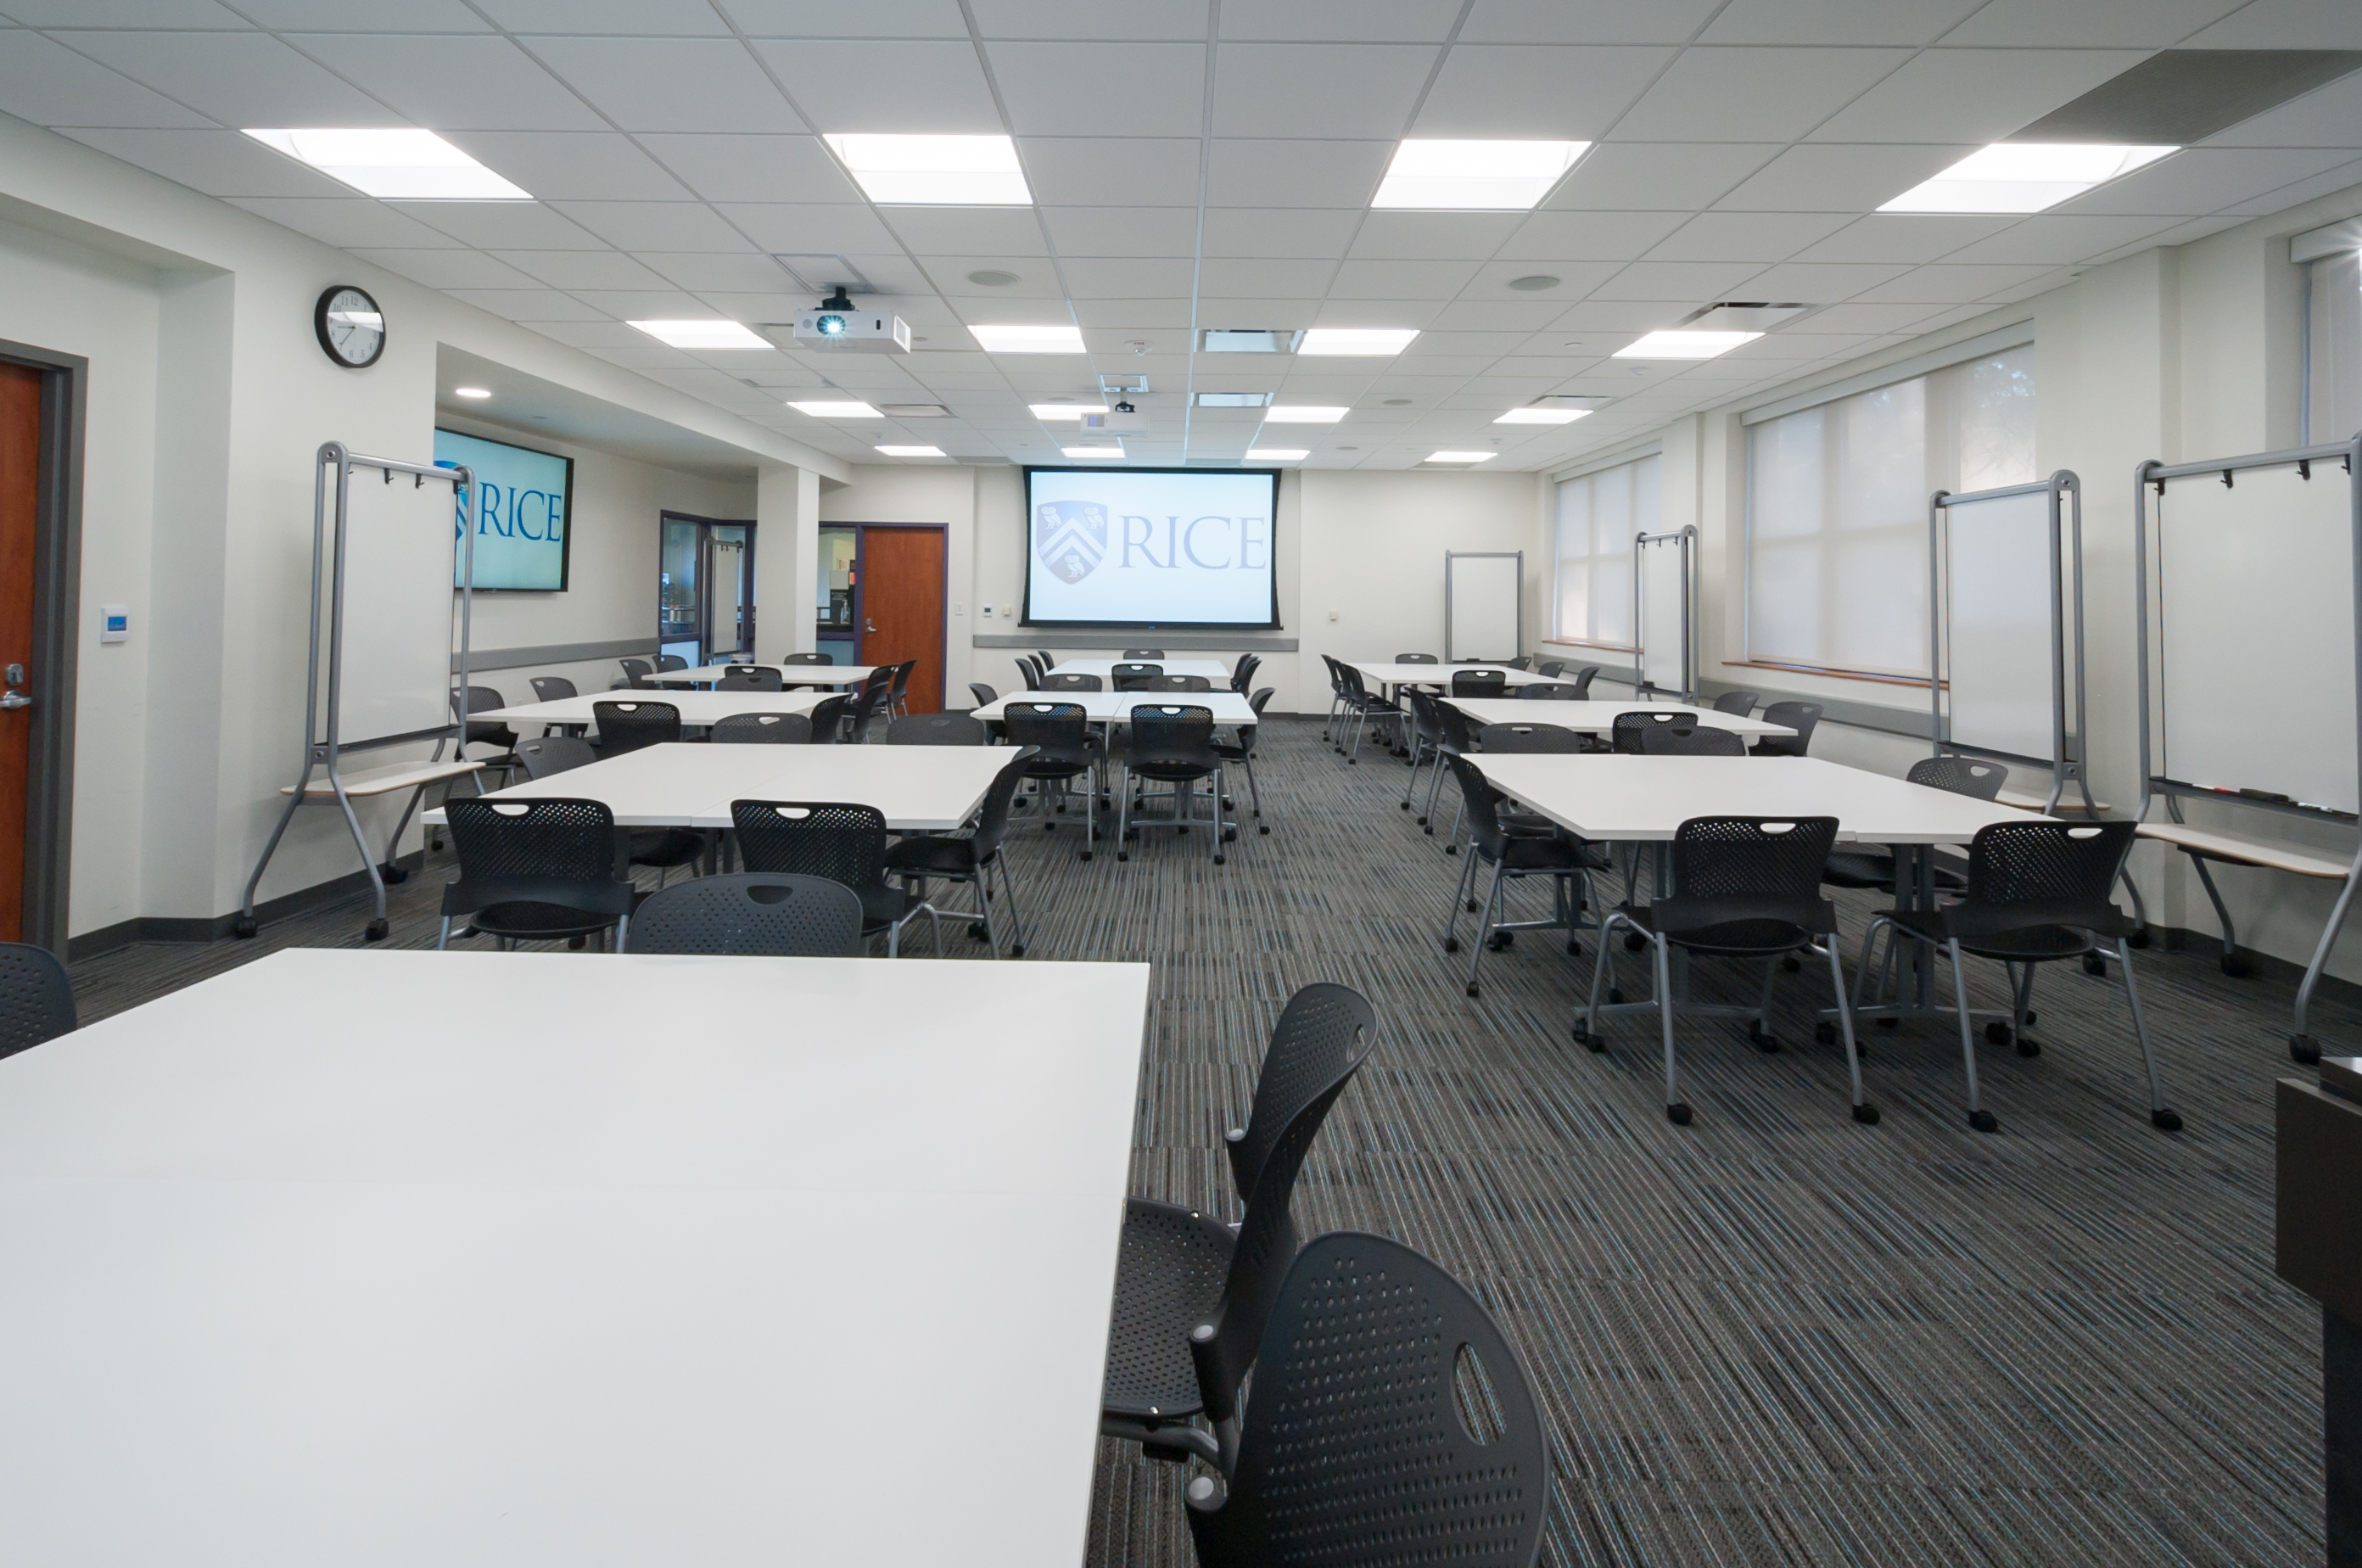
 RZR-119 Collaborative Classroom
-
 RZR-119 Collaborative Classroom
-
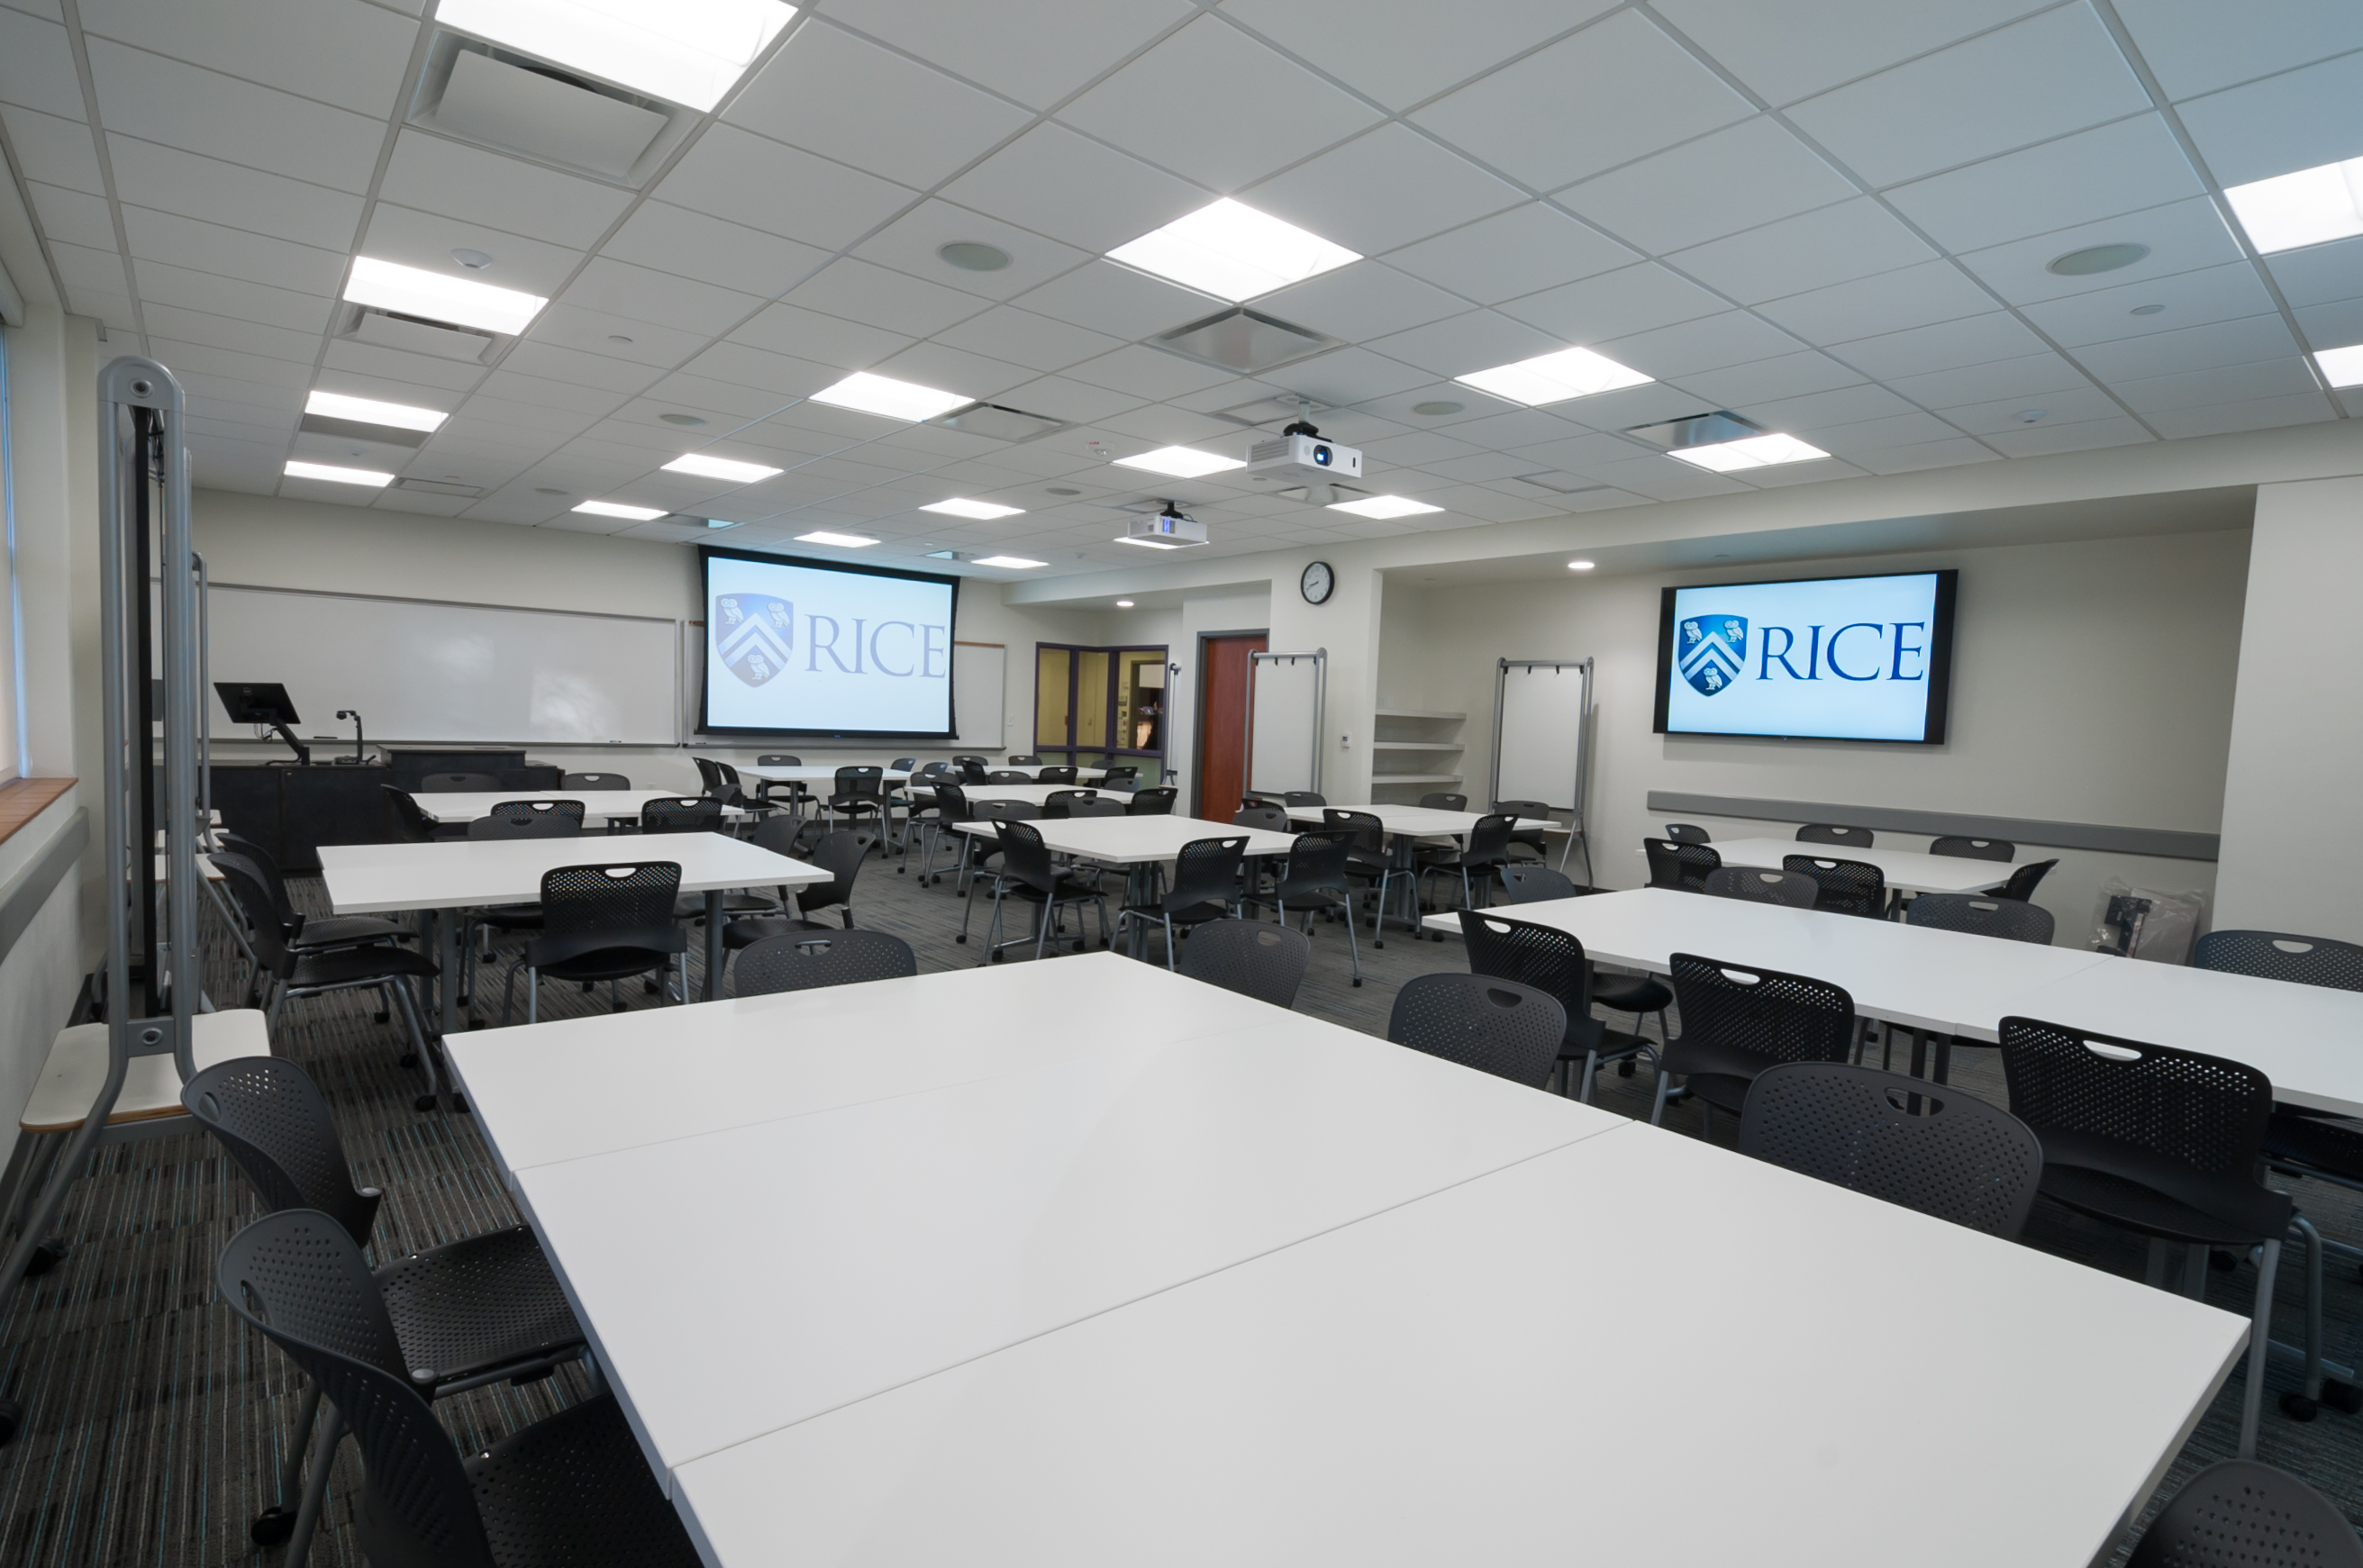
 RZR-119 Collaborative Classroom
- Room Type
- Classroom - SCALAR/Flexible
- Seats
- 64 - Tables & Chairs
- Lighting
-
Fluorescent
Dimmable
Zoned
- Windows
- Windows with Blinds/Shades
- Writing Surface
-
Whiteboard
20'(W) x 4'(H) - Projection Surface
-
Retractable (motorized)
12'(W) x 7'(H) - Computers
-
Instructor PC
1 PCs
1 Laptop VGA Ports
1 Laptop HDMI Ports
- Outlets
-
Power at seats? No
- Video Conferencing
-
Available? No
- Accessibility
-
Student Wheelchair Access? Yes
Instructor Wheelchair Access? Yes
- Flooring
-
Carpet
Request this room Request Help
Technology Instructions
Podium 4 (RZR-119)
The "Podium 4 RZR-119" class of podium is controlled by a touch-panel remote which is located on the wall to the right of the podium surface. The system contains two projectors and one display, a PC and MAC Mini computer, blu-ray/dvd disc player, and laptop VGA, HDMI, stereo audio connection inputs, and a microphone.
Classroom activation:
1 - Wake the touch-panel:
With a firm touch to the “touch-panel” screen or a firm press to the top left round button will wake the panel from hibernation. A “welcome image” will appear prompting you to perform another firm touch to the screen in order to continue.
2 - Activation of projectors/display:
With the touch-panel activated, a message box will appear that will allow you to choose the conifiguration of your session. At this time you may choose any combination of destinations or select all destinations, projectors front, rear, and display for the session. Press "All Proj/Disp with the same source" if teaching an "all" configuration is needed. You may also press "front projector only", "rear projector only", or "side display only" if another teaching configuration is necessary. You may also select "advanced mode" in order to have full flexibility with the room system and what displays are used with what source. You many also choose not to use a projector or display by selecting "no proj/display mode" on the source selection dialog box.
Note: If "no proj/display mode" was selected and subsequent use of the projectors/display is required, pressing the “exit” button on the right side of the touch-panel will exit the system and allow you to re-enter in order to select how the system will be used.
3 - Source display:
When your choice of configuration is selected, a guide dialog box will appear prompting the user to select their desired source. Please make sure to select the source you wish to use at this time.
Note: The selected computer, PC or MAC, may be in hibernation mode; thus you will have to "wiggle" the mouse or press the "Esc" (escape) button on the keyboard to wake the computer.
4 - Screen control:
The screen will be lowered automatically when the projector activates, thus there is no need to lower the screen manually. However, there is a screen switch on the wall nearest the podium if required.
5 - Monitor:
The monitor should be left on at all times, however “sleep mode” does activate after no source is present for 15 minutes. To wake the monitor, you must first activate the system at the “touch-panel”, wake the computer you plan to use by pressing the escape button or wiggling the mouse. Once the computer is operational an image should be presented on the monitor. It’s possible the monitor was powered off if no image is viewable on the monitor. Please locate the monitor power button and press to activate the monitor (location of power button will vary depending on monitor model).
6 - Audio:
There are three audio levels that must be taken into consideration when operating room audio. The computer audio should be at max level. The software audio should also be adjusted accordingly. The room audio at the touch-panel can then be adjusted up or down to further calibrate the room audio, this can be done using the “up” and “down” hard buttons on the left side of the touch-panel.
Note: If the Mac computer audio is "greyed out", this indicates that the audio can only be adjusted through the touch-panel. This is a function of the mac computer when connected to a source via HDMI cable.
7 - Microphones (if applicable):
Please see the corresponding microphone "tab" for room specific instructions.
Note: Not all classrooms are equipped with microphones.
Issues, questions, or urgent assistance please contact OIT Operations desk at 713-348-4989.
Dell OptiPlex 9020:
Operation:
The PC computer can be selected from the source selection device particular to the system being used. The PC computer has a 15-minute inactivity sleep timer that will activate when the keyboard or mouse are not moved, however the timer is rendered inactive when viewing a powerpoint file in presentation mode or watching a video (youtube, netflix, etc, or media player) in full screen mode. When the PC computer is selected you may need to "wiggle" the mouse or press any key on the keyboard to wake the computer.
Login:
On the login screen you may enter your "netid" or "temporary visitor id" that was obtained through the OIT help desk 713-348-HELP (4357). All software on the PC computer is available to all who login to the computer. The current software suite can be found at the following link.
USB:
The PC computer has USB ports on the front of the computer that can be used to plug and access your USB memory stick, charge a mobile phone, or plug a wireless receiver for a presentation advancing remote.
Software Link:
PC Software Load: (Fall 2016 - Spring 2017)
Issues, questions, or urgent assistance please contact OIT Operations desk at 713-348-4989.
Sony Microphone:
Sony lavaliere microphone transmitter (UTX-B03) operation instructions.
1 - Activation:
Press and hold the "power/muting" button for 3 seconds in order to activate the microphone. A green light will appear on the top left of the microphone marked "power".
Positioning: To use the "lav" microphone, take the "lav" microphone portion of the transmitter and clip it to the center of the chest, no more than 6 inches from the chin (Making an L shape with the index finger, and placing the index finger underneath the chin, with the thumb on the chest, will give you a near approximate location of where, on the chest, to clip the microphone). This would be the optimal location for the lav microphone to transmit a voice signal, since the center chest location will capture the voice signal regardless of what direction the head is turned.
2 - Deactivation:
To turn "off" the transmitter, hold the "power/muting" button for 3 seconds. The transmitter will then turn "off".
Note: Please be sure to turn “off” the microphone when not in use, in order to save battery life and not cause issues for the next user.
3 - Muting:
To mute the microphone, while the transmitter is "on", press the "power/muting" button once and the "audio" light on the top right of the transmitter will light "orange" thus confirming that the microphone is now muted. To un-mute, press the "power/muting" button again. The orange "audio" light will then turn off. The microphone is now un-muted.
4 - Volume:
You may adjust the volume at the podium volume controls, either through a touch-panel, flip-top button controller, or remote button controller. All microphone audio can be adjusted by the podium audio controls. For more information, please see the "room set-up" page of the room instructions.
Note: Please do not attempt to adjust the gain levels or any other functions on the microphone transmitter, this will adversely affect amplification and operation of the microphone system.
Issues, questions, or urgent assistance please contact OIT Operations desk at 713-348-4989.